
Quick Start Guide
To get started publishing a story, click the " New Achievement" button on your dashboard or on the Achievements tab. This will take you directly into the publishing workflow.
.
1) Summarize your achievement
Begin by setting up the landing page for your story. Here you will enter your achievement title and summary, select a category and semester for your achievement, and choose where your story appears online.

2) Add students to your story
To add your graduates to your achievement, choose the Upload Spreadsheet option. You will then be prompted to locate a spreadsheet on your computer and upload it. After uploading your file, your list students will appear below:
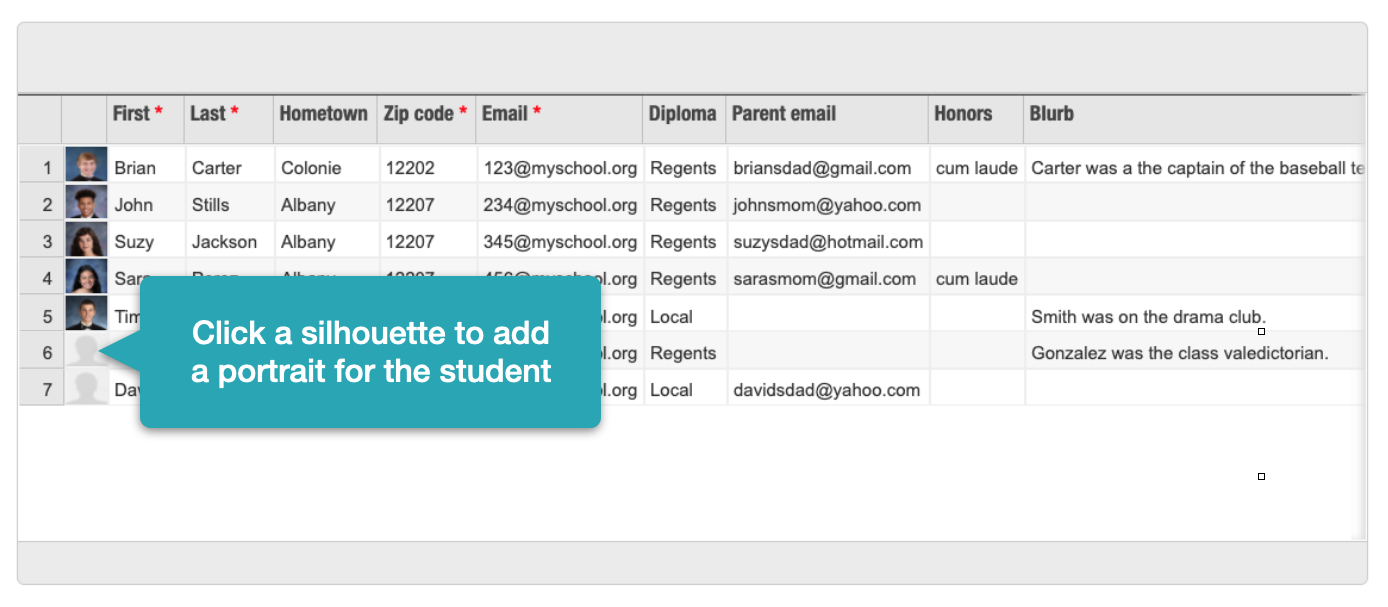
Mapping Student Data: Below the student grid, you will see a section for mapping student data. Fields such as first name, last name, hometown/city, zip code, major, class year and CEEB code will be automatically assigned, but you can use the dropdown boxes to make changes to these fields. You do not need to map a field in order to use it in your story.
Parent Emails: At the bottom of the mapping section, your will see an option for parent emails. If you have parent emails, simply check the corresponding box. Students' parents will then receive a graduation email at the same time as their child.
3) Write your online story
The story that you write here will appear on each student's Merit page. For your graduation story you will want to use the (default) personalized story. This version will use a mix of text and placeholders:

.
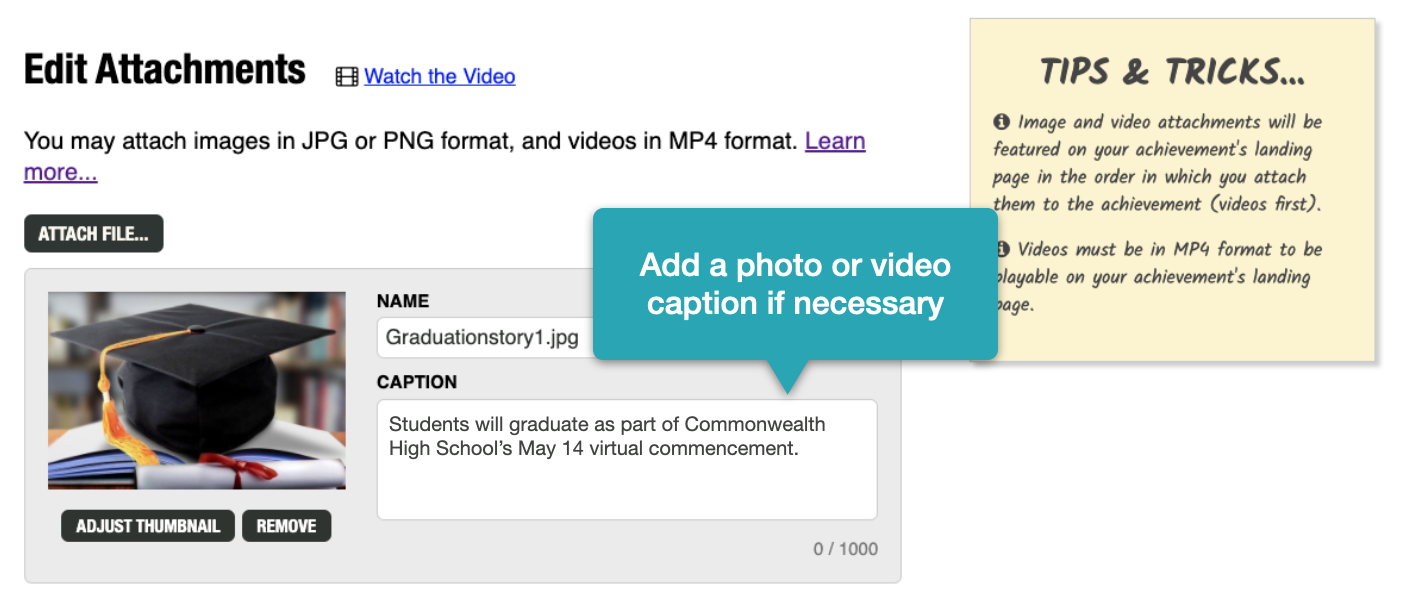
4) Add your photos and video
-
You may add as many photos or videos as needed to your story. The photos and videos chosen here will appear on each student's story. Click the Attach File button to add images:
.
5) Select your distribution channels
After writing your online story you will want to determine which additional audiences (if any) you'd like to reach:
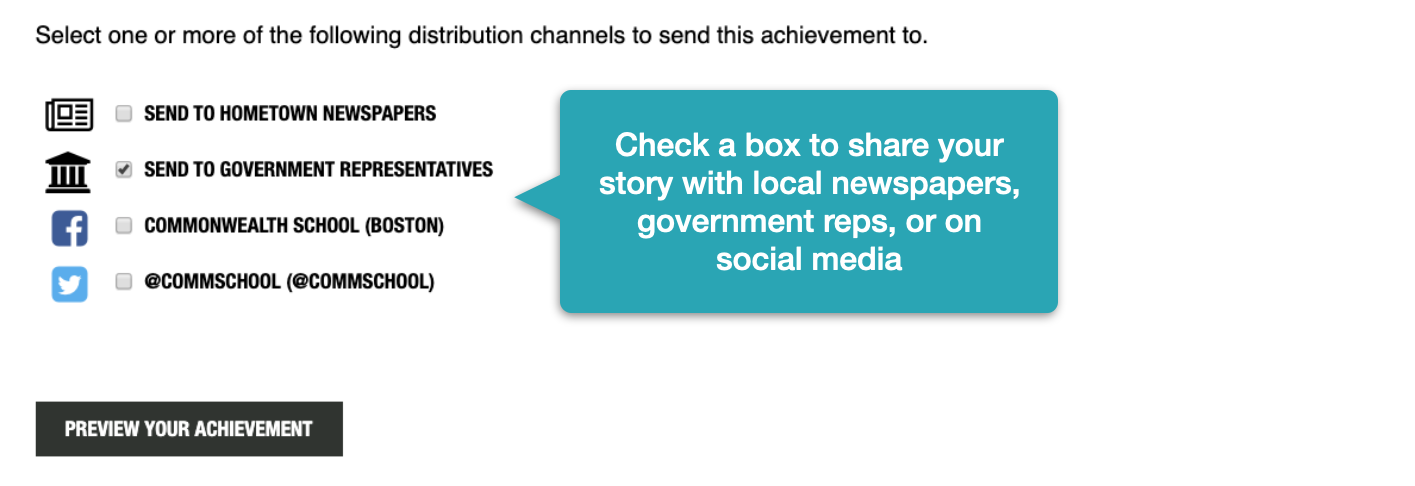
Note: Selecting the "Send to Hometown Newspapers" option will deliver news about all of your students to their local newspapers. We recommend that most public high schools skip this option.
.
6) Write your local press releases (optional)
Checking the "Send to Hometown Newspapers" box will open up the Write Your Press Release workflow. Here you have the ability to customize your press releases, starting with your contact information.
Merit will have automatically built both Individual and Group Press Releases for you, but you can click on the tabs to edit each of them.

Newspapers that are interested in only one student will receive Individual Press Release. If multiple students from your list fall within any one newspaper's coverage area, you will also need to draft a Group Press Release. Merit knows which version of your press release each paper should receive and who should be included on
.
7) Preview and Publish
Here you will be able to preview your story in its various forms. You will want to click the "Continue" button on each step, and then finally the "Publish Now" button to submit the story to Merit's editors for review.